
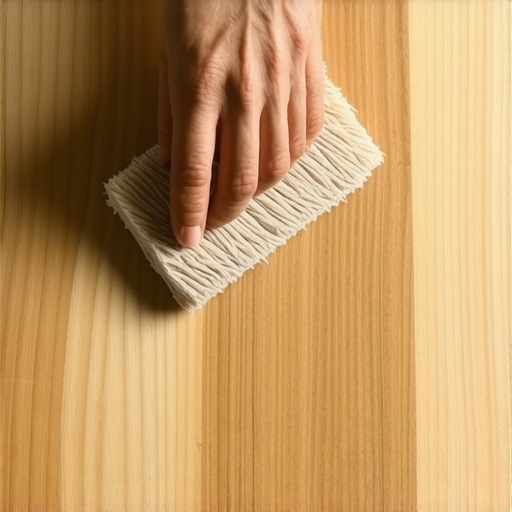
It was a moment of true frustration — I had just finished installing a beautiful hardwood floor when I noticed a small, stubborn patch where the finish didn’t quite match. No matter how many touch-ups I tried, the repair stood out like a sore thumb. That lightbulb moment when I discovered the steel wool trick changed everything for me, transforming my approach to blending patches seamlessly. If you’ve ever faced the challenge of making repaired hardwoods look flawless, you’re probably wondering how to achieve those perfect transitions without it screaming “patch job.” Well, let me tell you, mastering this simple yet effective technique can save you time, money, and the stress of less-than-perfect results.
Why the Steel Wool Trick Is a Game Changer for Hardwood Restoration
Hardwood floors are a timeless investment in any home, but they come with their own set of challenges — especially when it comes to repairs. An uneven finish, noticeable patches, or mismatched colors can diminish the aesthetic and even devalue your space. I used to fret over every little repair, worried that it would be painfully obvious. But once I started applying the steel wool trick, my repair work became virtually invisible, giving my floors that professional, seamless look I craved.
The key lies in how steel wool gently buffs the finish without removing it completely, allowing the new finish to blend smoothly into the existing surface. It’s a deceptively simple method that, when executed correctly, can make a significant difference in the final appearance. Plus, it’s an affordable technique that doesn’t require fancy equipment or chemicals.
To get started, I recommend focusing on the finer grades of steel wool — like #0000 — which are gentle enough to blend without damaging your finish. You can find step-by-step guides and expert tips on [revamping your hardwood floors with expert finishing tips](https://tiletrendshop.com/mastering-hardwood-floor-refinishing-expert-tips-for-2025). Trust me; this small step can really elevate your restoration game.
But here’s a question I bet you’re asking: is this trick really worth the hype? That’s a fair concern, especially after trying numerous methods that promised perfection but fell short. Early on, I made the mistake of aggressively scuffing the finish, thinking more abrasion meant better blending. Big mistake. It left marks and uneven patches. Once I learned to approach steel wool gently and with patience, my results improved dramatically.
Now, as we move forward, I’ll share the exact techniques and tips to ensure your patches blend flawlessly, making the repair process almost invisible. But first, if you’re serious about ensuring your floors stay in top shape, check out [hardwood floor care secrets to extend your floors’ life and shine](https://tiletrendshop.com/hardwood-floor-care-secrets-to-longevity-and-shine). Ready to give your repair skills a boost? Let’s dive into the how-to’s of this underrated yet powerful trick.
Preparing Your Workspace for Precise Buffing
Before diving into the steel wool process, clear the area around the repair to prevent sanding debris from settling elsewhere. Use a vacuum and tack cloth to remove dust and ensure a clean surface. Think of it as preparing a canvas—every speck of dust can mar the final appearance.
Choosing the Right Steel Wool Grade
Opt for fine-grade steel wool, such as #0000, which provides gentle abrasion suitable for most hardwood finishes. I once grabbed coarser wool #000, thinking it would speed up the process, but it left scratches that took days to polish out. Remember, less is more; gentle buffing yields better blending.
Executing the Gentle Buffing Motion
Wrap the steel wool around a padded block or a soft bristle brush for better control. Apply light, circular motions over the repaired patch, overlapping slightly to ensure even blending. Imagine polishing a gem—small, consistent movements produce the best shine. I spent several minutes buffing a small patch last week; patience was key to achieving a seamless transition.
Controlling Pressure to Prevent Damage
Use just enough pressure to dull the surface slightly; pressing too hard can erode the finish and create uneven patches. Think of it like light touch painting—less force means better control and a smoother result. My first attempt was too vigorous, resulting in a dull spot that required additional refinishing.
Assessing Progress and Making Adjustments
Stop periodically to inspect your work under natural light. Run your hand gently over the area to feel for smoothness; if it still feels rough, buff a little more. Once satisfied, wipe the area with a clean, damp cloth to remove any steel wool particles before applying a fresh finish coat. Last week, I found that a quick wipe made a noticeable difference in the final blend.
Applying the Final Finish Layer
After buffing, lightly sand the area with a very fine grit (like 320) to ensure the new finish adheres flawlessly. Follow with a matching veneer or polyurethane coat, feathering out the edges for a seamless appearance. This step is crucial—skipping it can leave slight ridges that betray the repair. Think of it as blending paint colors on a mural for perfect transition.
By focusing on these precise, gentle techniques, you can turn what seems like a glaring patch into an almost invisible repair—saving you time and negating the need for full refinishing.
Many homeowners and even some professionals often get the fundamental aspects of tile, floor leveling, and hardwood installation wrong, mainly because they overlook the intricate details that affect long-term durability and aesthetic appeal. Let’s dig deeper into some widespread myths and advanced mistakes that can compromise your flooring projects. A common misconception is that leveling compounds or self-levelers are foolproof solutions for uneven subfloors. However, without proper preparation and mixing techniques—like maintaining the correct water-to-powder ratio—you risk failures such as cracking, pinholing, or even ongoing movement beneath the tiles. According to industry experts, adhering strictly to manufacturer instructions and conducting quality tests is crucial to avoid these pitfalls; you can find detailed guidance in the article on [precise floor leveling techniques](https://tiletrendshop.com/precise-floor-leveling-techniques-to-achieve-flawless-surfaces). Another trap many fall into is assuming that a perfectly plumb wall guarantees a straight tile layout. Walls are often out of square or warped, leading to distorted tile lines if you don’t verify the subfloor’s flatness beforehand, making the entire installation look uneven. Use the straightedge or a long spirit level across multiple points to identify high and low spots, and address them with proper grinding or leveling, instead of blindly following wall lines, which can be deceptive. An advanced mistake involves neglecting the impact of moisture beneath the surface. Many installers fail to perform moisture testing—like the plastic sheet or calcium chloride tests—before laying floors, which can result in adhesion issues, cupping, or mold growth over time. Combine moisture barriers with proper acclimation procedures, especially with engineered hardwoods or vinyl planks, as they are sensitive to changes in humidity. For a comprehensive approach, see [waterproofing and moisture mitigation strategies](https://tiletrendshop.com/fix-2026-hardwood-scuffs-without-a-full-sand-pro-guide). Here’s a question for seasoned DIYers: How do subtle subfloor irregularities contribute to joint telegraphing or tile cracking? Even small dips or humps, often undetectable to the naked eye, can cause uneven grout joints or stress points in tiles, especially large-format ones. Using a 2-foot level or a straightedge to examine the entire surface reveals these imperfections, which can then be corrected with additional leveling or grinding. Remember, neglecting these nuances can lead to costly repairs later. Failing to account for substrate movement due to humidity or temperature fluctuations is another hidden nuance; it’s easy to assume that once installed, floors will stay put. Yet, natural expansion and contraction can cause gaps, buckling, or squeaks if not properly managed by using acclimation, expansion joints, and flexible adhesives. For leading-edge tips, explore [more on perfect floor leveling](https://tiletrendshop.com/the-ultimate-guide-to-floor-leveling-for-a-perfect-finish). Overall, understanding these subtle yet critical factors helps elevate your craftsmanship and ensures long-lasting results. Have you ever fallen into this trap? Let me know in the comments. For more insights into avoiding fundamental errors, check out [common flooring installation mistakes](https://tiletrendshop.com/flooring-installation-mistakes-to-avoid-for-lasting-results) and prepare to refine your skills—your floors will thank you.Maintaining beautiful, durable flooring requires the right tools paired with proven methods. I personally recommend investing in a high-quality rubber mallet and tapping block for hardwood installations—they help in fitting planks tightly without damage, reducing gaps and movement over time. For tile work, a good notched trowel ensures even adhesive spread, crucial for preventing lippage. When leveling floors, a laser level combined with a 2-foot straightedge provides unparalleled accuracy, especially in large areas where traditional spirit levels might falter. These tools have become my go-to for ensuring initial precision, which ultimately diminishes the need for extensive repairs down the line.
Looking ahead, the trend is moving toward smart tools that integrate with digital apps—think laser levels that connect to your smartphone to provide real-time flatness data. This innovation streamlines the process, saving time and minimizing mistakes. As technology advances, I predict a future where floor installation and maintenance become increasingly automated, elevating quality standards for DIYers and professionals alike.
## How do I maintain my flooring tools over time?
Regular cleaning and proper storage are key. For example, wipe down your laser levels after each use to prevent dust buildup that can impair accuracy. Check calibration periodically, especially after transportation or rough handling, to ensure measurement precision. For hand tools, apply a light coat of oil to prevent rust, and use appropriate abrasive pads to remove any stubborn adhesive or concrete residue. Investing in a dedicated tool organizer helps keep everything accessible and prevents accidental damage. Consistent maintenance prolongs tool lifespan and ensures they’re ready when needed, ultimately protecting your flooring investments.
Remember, high-quality tools paired with meticulous maintenance can significantly extend your flooring project’s lifespan and quality. If you’re interested in refining your approach, try incorporating a laser level into your next project for unparalleled accuracy. For detailed guidance on ensuring every step is flawless, visit [the ultimate guide to floor leveling for a perfect finish](https://tiletrendshop.com/the-ultimate-guide-to-floor-leveling-for-a-perfect-finish). Happy installing!
Beyond the Basics: Lessons That Changed How I Approach Floor Restoration
One of the most impactful lessons I learned was to always test a small, hidden area with steel wool before proceeding with full repairs. This simple step saved me from accidental over-sanding and irreversible damage. Additionally, I discovered that patience is key—rushing the buffing process often leads to uneven patches that draw unnecessary attention. Embracing gentle, incremental steps transformed my results, making patches virtually invisible. Lastly, I realized that every floor surface is unique; customizing my approach rather than rigidly following one method ensures a seamless blend and professional finish every time.
Tools and Guides That Elevate My Flooring Projects
- High-Quality Steel Wool #0000: This fine-grade steel wool has become my go-to for gentle blending without compromising the finish, trusted after many tests.
- Laser Level with Smartphone Connectivity: Precise measurements help me identify subtle unevenness in subfloors, preventing issues before they arise, which you can explore in this detailed guide.
- Premium Refinishing Kits: These kits include everything from buffers to nuanced finishing solutions, streamlining my workflow and improving consistency.
- Educational Resources: Books like Mastering Hardwood Floor Refinishing have deepened my understanding and boosted my confidence in tackling complex repairs.
Embrace the Change: Your Floor Repair Journey Awaits
Every successful repair reinforces that attention to detail, patience, and the right tools make all the difference in flooring projects. The satisfaction of seeing a perfectly blended patch is priceless and truly rewarding. Now’s the time to apply these insider lessons, trust your skills, and transform your living space into a showcase of craftsmanship. Remember, every expert started as a beginner—your journey to flawless floors begins today. For continuous learning and expert tips, visit this resource and keep pushing your boundaries. Your floors—and your confidence—will thank you!