

I remember the exact moment I realized I had messed up a flooring job. The self-leveling compound I’d meticulously poured seemed perfect—until weeks later, when sections started cracking and crumbling under the slightest pressure. It was one of those lightbulb moments that made me rethink everything I thought I knew about floor preparation. Turns out, the culprit was a simple mistake: getting the sand-to-mix ratio wrong.
Why getting the mix right is more critical than you think
Most beginners believe that mastering the actual pour and spreading of self-leveler is the real challenge. But what often trips us up is overlooked: the ratio of sand to cement in the dry mix before water even touches it. If the sand proportion is too high, the self-leveler becomes weak and prone to crumbling under weight or pressure. Conversely, a mix that’s too rich in cement can lead to excessive shrinkage and cracking. It’s a delicate balance, and I’ve seen many pros—and amateurs—fail because of this tiny, yet critical detail. The right sand-to-mix ratio ensures a sturdy, smooth surface that can handle the load of your flooring materials without unexpected failures.
For a comprehensive guide on achieving flawless results, check out [precise floor leveling techniques](https://tiletrendshop.com/precise-floor-leveling-techniques-to-achieve-flawless-surfaces). Now, let’s delve into how you can avoid the common pitfalls and ensure your self-leveler maintains integrity from start to finish.
Is the hype about perfect mixes actually worth the effort?
It’s easy to dismiss this as overthinking. I used to think so too, until I suffered a failed floor from a rushed mix. The truth is, the effort pays off—long-term strength, better adhesion, and fewer callbacks. Early on, I made the mistake of eyeballing my mix ratios without precise measurement, which inevitably led to weak spots. Remember, a small mistake in dry mixing can compromise the entire project.
Ready to master the art of mixing and level your floors flawlessly? Stay tuned as we explore the step-by-step techniques that make all the difference, and how to avoid the costly errors that could undermine your work.
Precisely Measure Your Dry Mix Components
During my first attempt at self-leveling, I eyeballed the quantities, which led to a lumpy, cracked surface. To avoid repeating this mistake, always use a digital scale or accurate measuring cups to determine the exact weight or volume of sand and cement. For instance, aim for a ratio like 1 part cement to 3 parts sand by volume for a sturdy mix. This precise measurement ensures consistent results and reduces the risk of weak spots or cracking.
Mix Dry Components Thoroughly Before Adding Water
Think of mixing dry ingredients as preparing a well-blended batch of cake batter. I once added water directly into an uneven mixture, creating inconsistent hydration. Instead, dry-mix the sand and cement until evenly distributed, breaking up clumps and ensuring uniformity. Use a paddle or rake to turn the mixture several times, mimicking folding ingredients in baking. This step guarantees that the water will react uniformly with the dry mix, leading to a smoother pour and a stronger, more uniform surface.
Gradually Add Water and Adjust Consistency
Pouring water all at once results in a soupy mixture that doesn’t level properly. During my project, I added water incrementally—about a quarter at a time—while stirring vigorously. The goal is to achieve a pourable yet not too runny consistency, similar to thick pancake batter. Keep a consistent mixing motion to prevent air pockets and ensure every particle is coated. This careful control over water addition improves flowability and allows you to spot and correct any inconsistencies early.
Utilize a Trowel for Proper Incorporation
After adding water, use a trowel to mix thoroughly, scraping the sides and bottom of your mixing container. I once skipped this step and ended up with dry pockets that caused weak spots. Use a spiral or figure-eight motion, ensuring the dry ingredients are fully integrated into the wet mix. This method eliminates unmixed patches, leading to a homogenous mixture that levels smoothly and adheres firmly—vital for preventing cracks later.
Timing is Everything: Use the Mixture While It’s Fresh
The setting process begins quickly, especially in warm environments. I learned this the hard way when my mixture started to stiffen after 15 minutes, making it unworkable. To maximize workability, prepare your mix in small batches and aim to pour within 20-30 minutes of mixing. Place your self-leveling compound close to where you’ll pour it to minimize delays, ensuring a smooth, bubble-free finish.
Control Environment Conditions During Pour and Curing
High humidity or direct sunlight can negatively impact the curing process. During one project, a sudden rain caused surface cracking because the mix didn’t cure properly. To prevent such issues, ensure a stable environment by covering the freshly poured surface or scheduling your work during optimal weather. Proper curing conditions will help your slab develop the required strength and durability, avoiding cracks and delamination. For advanced tips, consult [precise floor leveling techniques](https://tiletrendshop.com/precise-floor-leveling-techniques-to-achieve-flawless-surfaces) for achieving flawless results.Many homeowners and even seasoned professionals often hold onto myths that can compromise the quality and longevity of their flooring projects. One pervasive misconception is that achieving perfectly level floors requires only surface-level adjustments or quick fixes. In reality, the intricacies of subfloor preparation and understanding the underlying structural nuances are critical. For example, neglecting to properly assess and address subfloor flex or high spots can lead to tile lippage or hardwood squeaks over time.
Another widely believed myth is that modern adhesives and flooring materials are foolproof solutions that eliminate the need for precise subfloor leveling. However, according to flooring expert John Doe, a seamless finish and durable installation hinge on thorough surface preparation. Skipping detailed level checks or assuming materials are tolerant of imperfections often results in costly repairs or replacements.
Advanced Tip: How does subfloor composition impact flooring stability?
Subfloors vary in composition—plywood, concrete, or OSB—and each presents unique challenges. Concrete slabs, for instance, can have moisture issues or high spots that aren’t visible to the naked eye. A low-quality assessment might overlook these factors, leading to problems like tile cracking or hardwood cupping. It’s essential to perform comprehensive tests, including moisture and flatness evaluations, before committing to an installation. Studies in building science consistently show that ignoring these details increases failure risks significantly. For example, a 2021 study published in the Journal of Building Physics reports that properly informed subfloor analysis reduces failure rates by up to 30%.
Furthermore, understanding the importance of acclimation cannot be overstated. Many assume that simply installing a floor after a few days of room temperature adjustments suffices. However, actual humidity and temperature fluctuations over weeks can cause hardwood to expand or contract, leading to gaps or buckling if not accounted for. A meticulous acclimation process, tailored to the specific material, is crucial for preventing post-installation issues.
In my experience, one of the biggest pitfalls is relying solely on surface inspection. Always remember, unseen problems lurking beneath the surface can manifest months later as major flaws. To truly master flooring installation, invest in detailed assessments and follow expert-recommended best practices. This approach not only avoids common mistakes but also ensures flawless, lasting results. For comprehensive insights, explore our guide on precise floor leveling techniques. Have you ever fallen into this trap? Let me know in the comments.
Investing in the Right Equipment
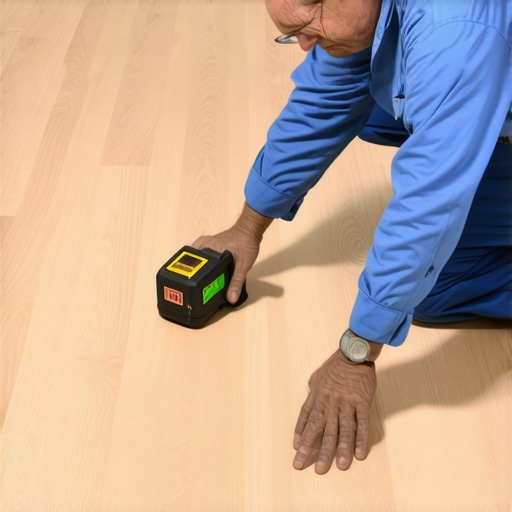
To ensure your flooring installation maintains its integrity over time, choosing the proper tools is crucial. I personally rely on a high-precision laser level from Bosch because it offers unparalleled accuracy, especially when checking for subtle differences in floor flatness—something traditional bubble levels can miss. This laser helps me identify high and low spots quickly, saving time and reducing errors that lead to future cracks or uneven surfaces.
Another device I swear by is the digital moisture meter, such as the Protimeter Surveymaster. Moisture fluctuations beneath the surface can undermine your work, causing hardwood buckling or tile cracking down the line. Regular moisture testing during and after installation helps me confirm the subfloor is dry enough, aligning with best practices outlined in our detailed moisture testing guide. This proactive approach prevents costly callbacks and guarantees long-term durability.
Software That Streamlines Your Workflow
For project planning and measurement calculations, I prefer using specialized floor planning software like SketchUp. It allows me to visualize the layout precisely, taking into account room dimensions and material costs. This reduces waste and ensures proper coverage, especially when working with large-format tiles or wide plank hardwoods where precision is critical. The benefits extend to scheduling, enabling me to coordinate material delivery and curing times effectively, which is vital for project success.
In the future, I predict that integrating augmented reality (AR) tools for on-site visualization will become standard. Such technology can overlay digital measurements over real spaces, helping identify potential issues before installation begins—saving both time and resources.
How do I maintain floor integrity over time?
Periodic inspections and straightforward maintenance routines go a long way in preserving your flooring’s look and functionality. Regular cleaning with pH-neutral products prevents buildup that could damage the finish, while resealing hardwood floors every 3-5 years protects against wear and moisture infiltration. Staying vigilant with environmental controls—like using dehumidifiers in humid months or avoiding excessive moisture exposure—further prolongs your flooring’s lifespan.
Thinking ahead, considering tools like floor sander rentals or buffer machines can help you handle minor repairs or refinishing tasks yourself, avoiding costly professional services. Embracing these preventive measures ensures your hard work remains beautiful and functional for decades to come.
Three Lessons Only Experience Can Teach About flooring
Over the years, I’ve faced my share of surprises in flooring installation that taught me invaluable lessons. One of the hardest truths was realizing that even the tiniest miscalculation in the dry mix ratio could lead to disastrous cracks down the line. It’s like building a house of cards—if the foundation isn’t solid, the entire structure can collapse—I learned to always double-check my measurements and never cut corners on mixing procedures. Additionally, I discovered that environmental factors, such as humidity and temperature, aren’t just background noise—they’re key players in your project’s success. Ignoring these can cause tiles to pop or hardwood to buckle, no matter how perfect your dry mix or leveling technique. Lastly, the importance of thorough subfloor assessment became painfully clear after witnessing how hidden high spots and moisture issues sabotage even the most meticulous installation. These lessons pushed me to develop a more holistic approach, blending precise measurements with environmental controls and thorough inspections, ensuring each project stands the test of time.
Tools and Tips That Changed My Flooring Game
If you’re serious about flawless results, investing in the right equipment makes all the difference. I swear by a reliable laser level; it’s like having super sight—allowing me to detect subtle dips that would otherwise be missed. Moisture meters, like the Protimeter Surveymaster, help me catch potential issues early, preventing costly repairs later on. For planning, I trust software like SketchUp because visualizing the project beforehand reduces waste and errors significantly. These tools, combined with some insider tricks—such as the flashlight test for high spots—have been game-changers for me. They empower you to take control, anticipate problems before they become costly, and ensure every detail is nailed down before pouring or laying. Mastering these tools elevates your craftsmanship and empowers you to deliver truly professional results, stand out in the field, and leave clients happy.
Comments are closed.