
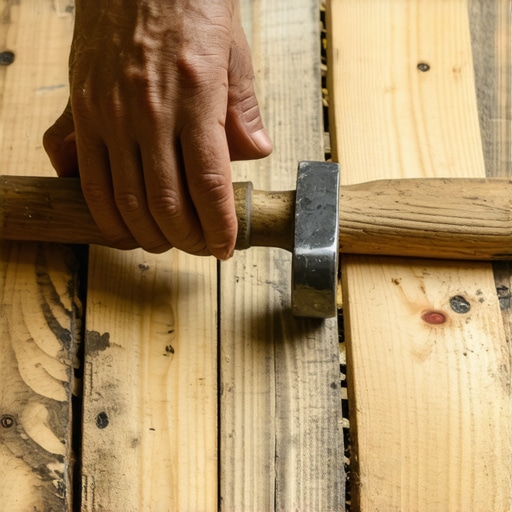
I remember the moment vividly—standing in my living room, staring at the uneven gaps in my aging hardwood floors, feeling both frustrated and a little defeated. No matter how many times I tried to tighten things up with conventional tools, those stubborn gaps refused to close. Then, it hit me—what if I could just tap them closed? That lightbulb moment led me to discover a simple yet surprisingly effective technique that transformed my floors and my confidence.
Discover the Power of Your Tapping Block
Old hardwood floors can develop gaps over time due to humidity changes, wood expansion and contraction, or settling of the house. These gaps aren’t just aesthetic issues—they can also lead to more significant problems like creaking, further separation, and even damage if left unaddressed. Many homeowners shy away from tackling these repairs themselves, fearing they lack the tools or expertise. But I’ve found that with the right approach, fixing these gaps can be straightforward, affordable, and satisfying.
What I want to share today is a technique I’ve personally used and refined—using a tapping block to gently nudge those stubborn boards back into place. It sounds almost too simple, but trust me, this hack changed how I approach floor repairs. It’s a method that requires minimal investment and offers immediate results.
Before diving into the step-by-step, I want to emphasize that this isn’t a magic fix for every gap—severe warping or structural issues need professional attention. But for minor to moderate gaps, especially in older hardwoods, this can be your secret weapon.
Is a Tapping Block Actually Worth the Hype?
One concern I hear often is whether this method will cause more harm than good. I’ll admit, I initially worried about damaging the wood or splintering the boards. The early mistake I made was using too much force and not testing in a small, inconspicuous area first. Once I learned to gently and carefully tap along the edges, the gaps started closing without any damage. For more insights on avoiding common flooring installation pitfalls, check out this comprehensive guide on [flooring mistakes to avoid](https://tiletrendshop.com/flooring-installation-mistakes-to-avoid-for-lasting-results).
Now that I’ve shared my experience and addressed some doubts, let’s get into the practical steps—because honestly, this hack could save you a lot of time and money. Are you ready to give it a try and say goodbye to those pesky gaps? Let’s go!
Start with the Right Tools and Setup
Before you begin, gather a good quality tapping block, a rubber mallet, and protective gloves. Think of the tapping block as a gentle ‘hammer’ that pushes the boards into place without damaging the wood. I once tried using a metal hammer directly on my hardwood, which led to unwanted dents. Using a proper tapping block shielded my floors and gave me precision control.
Identify and Isolate the Gaps
Walk along your floor with a flashlight or bright light at an angle to spot the stubborn gaps. I remember crouching down in my living room with a flashlight, illuminating each crack. Mark the areas subtly with painter’s tape if needed, so you don’t accidentally over-tap areas that don’t need adjusting. Focus on moderate gaps; severe warping might require professional intervention. For a comprehensive understanding of floor issues, check out this guide on floor leveling.
Position the Tapping Block Correctly
Place the tapping block along the edge of the loose board, ensuring it’s aligned with the direction of the gap. Imagine it as a bridge—you want to distribute pressure evenly. For stubborn boards, place the block on the side opposite to the gap. I once positioned the block wrongly, causing the board to lift instead of close the gap. Adjusting the placement is key to controlled nudges. Think of it as guiding a pet—gentle and deliberate.
Apply Gentle Taps to Close the Gap
Using the rubber mallet, give gentle, controlled taps on the tapping block. The goal is to nudge the board without causing any damage. Like pressing gently on a balloon, too much force can cause cracks or splinters. Personally, I found that small, rhythmic taps worked best—about 3-4 per second. It took patience; rushing may cause misalignments. For more detailed techniques, see precise leveling methods.
Repeat and Assess the Progress
Regularly check the gap after a few taps to assess if the boards are moving closer. Don’t tap blindly; compare the gap size before and after. I once thought I made progress, only to find I had lifted the board slightly. Resetting the position and re-tapping corrected that mistake. Use your eyes and fingertips—they are your best indicators of success. Remember, patience and caution are your best allies in this process.
Final Checks and Fine-tuning
Once the gaps diminish, walk across the area to ensure the floors feel even underfoot. Sometimes, a slight unevenness remains, which can be fixed by light tapping on specific high spots. Avoid over-tapping; excessive force can cause more harm than good. If persistent gaps remain, consider consulting flooring professionals or exploring advanced leveling techniques. This method, when executed carefully, can make your hardwood look seamless and professionally finished.
When it comes to laying tile, hardwood, or leveling floors, many homeowners operate under misconceptions that can hinder their results. One pervasive myth is that floor leveling is solely about adding more self-leveling compound until everything appears flat. In reality, achieving a flawless surface requires understanding subfloor dynamics, material properties, and proper moisture testing. Overlooking these factors can lead to cracks, lippage, or uneven finishes, even if the surface initially looks perfect. Advanced installers know that proper subfloor preparation—like checking for humps with tools such as the 2-foot level—is fundamental, as detailed in expert guides like this comprehensive floor leveling guide. A common mistake is believing that all floor materials behave the same; for example, engineered hardwood responds differently to moisture than solid wood and demands tailored acclimation processes. Misjudging these nuances can cause gaps or buckling post-installation, which are costly to fix. Moreover, many assume that tile lippage is primarily a surface issue, but in truth, it often points back to a warped or uneven subfloor—highlighted in tile installation insights. It’s essential to recognize that flooring is a system, and attention to detail at every stage—like verifying subfloor flatness or ensuring proper primer adhesion—saves time and money. By understanding these deeper aspects, you can avoid common pitfalls and elevate your craftsmanship. Have you ever fallen into this trap? Let me know in the comments.Maintaining your flooring and selecting the right tools are crucial for long-term beauty and durability. I recommend investing in a high-quality rubber mallet, which I personally use for gentle yet effective adjustments during floor leveling. Unlike standard hammers, a rubber mallet minimizes the risk of damaging wood or tiles, ensuring your work remains pristine. For precision measurements, a top-tier laser level like the Bosch GLL 55 offers unparalleled accuracy, helping you identify uneven areas with ease—especially when combined with regular checks using a 2-foot level, as detailed in comprehensive floor leveling guides. To keep everything in top shape over time, I suggest establishing a regular inspection routine. Walk through your space monthly, checking for loose tiles, gaps, or creaking sounds, so issues are addressed before they escalate. Using a multi-tool with oscillating functions can also be a game-changer for minor repairs like removing grout or scraping debris from seams without damaging surrounding surfaces. The trend in flooring maintenance is moving towards smarter, more integrated approaches; future innovations may include IoT sensors embedded in floors to monitor structural issues remotely. To stay ahead, familiarize yourself with tools like moisture meters to prevent buckling caused by unnoticed humidity fluctuations. An example is the Protimeter Surveymaster, which helps detect moisture beneath the surface before initiating repairs—saving time and money. How do I maintain hardwood floors over time? Consistent cleaning with the right products, like pH-balanced wood cleaners, and protective pads under furniture can extend your flooring’s lifespan significantly. I also recommend scheduling periodic deep-cleaning sessions and refinishing, especially for high-traffic areas, to preserve their luster. For detailed techniques on extending your floors’ life, check out hardwood floor care secrets. Remember, investing in the proper tools and regular upkeep isn’t just about appearance; it’s about protecting your investment for years to come. If you’re looking to get serious, try incorporating a moisture meter into your routine—it’s a small step that can prevent costly repairs later. Ready to upgrade your toolset and maintain your floors like a pro? Dive into expert tips and make your flooring last longer today!
Lessons I Wish I Learned When I Started Tiling and Flooring
- One of the hardest lessons I faced was that not all gaps are created equal. Sometimes, what looks like a minor issue is a symptom of a deeper subfloor problem—skipping tests like the plastic sheet moisture check can lead to costly mistakes, as I experienced firsthand.
- I underestimated how critical proper tool selection is. Using a rubber mallet with a tapping block was a game-changer, preventing damage while fixing stubborn gaps. Cheap tools often lead to frustration—investing in quality tools is worth every penny.
- Patience truly pays off. Rushing the tapping process resulted in misaligned boards, which I had to fix later. Gentle, rhythmic taps allowed me to close gaps smoothly and confidently, saving me often rework.
- The importance of continuous learning became clear when I discovered that proper acclimation and moisture testing are essential before installation. Neglecting these steps often leads to gaps and cracks down the line—knowledge from guides like this comprehensive floor leveling guide has been invaluable in avoiding missteps.
- Finally, I realized that sometimes, no matter how much effort I put in, certain issues need a professional eye. Recognizing when to call in experts not only saved my floors but also kept my peace of mind intact.
Tools and Resources That Elevated My Flooring Journey
- Laser Level Bosch GLL 55: Accurate and easy to use, this laser level helped me identify uneven spots early on, saving me time and guesswork. It’s a staple for precision in any flooring project.
- Moisture Meter Protimeter Surveymaster: Moisture issues are the silent killers of floors. Having this device by my side prevented humidity from ruining my hardwood after installation. It’s become my go-to for moisture testing.
- The Ultimate Guide to Floor Leveling: This detailed resource demystified subfloor prep, teaching me the importance of flatness and proper leveling techniques. It’s a must-read for anyone serious about flawless results.
- Quality Tapping Block and Rubber Mallet: Small tools with a big impact. Using these correctly helped me avoid damaging my planks while nudging them into perfect alignment. Don’t underestimate the power of good tools!
Your Next Step in Flooring Excellence
Remember, every project is a learning experience—and the more you master the essentials, the better your results will be. Whether you’re fixing stubborn gaps or planning a full renovation, embracing these insider lessons can make all the difference. Don’t be afraid to experiment, ask questions, and seek out expert advice when needed—your floors will thank you for it. Ready to take your flooring skills to the next level? Dive into resources like this guide on professional flooring installation and keep pushing your boundaries. What small tweak has made the biggest difference in your flooring projects? Share your experience below!
Comments are closed.