
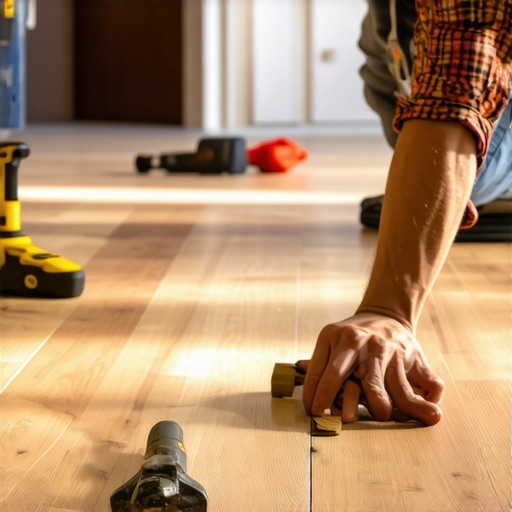
It was late afternoon when I finally looked down at the mess I’d created under my feet—scratched, loose vinyl planks with gaps where they shouldn’t have been. I’d been so eager to finish my flooring project that I hammered with reckless abandon, convinced that more force would lock the planks tighter. The result? Instead of a seamless floor, I had a distorted, fragile surface that looked like a beginner’s mistake. That lightbulb moment hit hard—I realized I’d been jeopardizing the very system meant to make my job easier.
How My Overzealous Hammering Ruined the Click-Lock System
The click-lock flooring system is designed to join planks with a simple, effective locking mechanism. It’s built for efficiency and, when used correctly, can be DIY-friendly. But I learned firsthand that applying too much force can backfire. Excessive hammering not only damages the locking edges but can also cause the planks to split or misalign, eventually leading to gaps, squeaks, or even complete failure of the installation.
Could I be harming my flooring without knowing it? Or worse, wasting time and money fixing mistakes that could have been avoided? I sure did early on. That’s why I’ve studied the best practices and gathered expert tips—so you won’t have to learn the hard way.
Let’s make sure your next flooring project is a success, not a lesson in frustration. Ready to discover the secrets to installing vinyl click-lock planks correctly? Let’s dive in.
Applying the Right Force During Click-Lock Installation
To ensure a secure and damage-free lock, avoid the temptation to hammer the planks excessively. Instead, use a tapping block and a rubber mallet to gently click the planks together. I vividly recall a time when I hammered the last row of planks excessively, thinking I needed more force; this resulted in split edges and gaps. Using a tapping block allowed me to apply even force without risking damage, leading to a seamless finish. Remember, the click mechanism is designed for precise fitting, not brute force.
Aligning and Connecting Planks Step-By-Step
Begin by laying out the first row carefully, ensuring the starter line is straight. When connecting subsequent planks, align the tongue of one plank with the groove of the next at a slight angle, then gently lower it into place. Use a tapping block along the edges to snugly lock the planks without forcing them. I once misaligned a plank by forcing it into place, which caused it to buckle later. Be patient and use gradual, gentle taps to achieve proper alignment.
Handling Gaps and Uneven Surfaces
Gaps often occur from irregular subfloors or improper leveling. Before installation, double-check the subfloor with a long level or straightedge. For minor dips or humps, apply specialized floor leveling compounds—consult the article on floor leveling techniques—to create a smooth foundation. During my first project, I ignored subtle dips, which resulted in squeaks; fixing this later was costly. Ensuring a flat subfloor is critical to prevent gaps and maintain a professional look.
Proper Use of Tools to Avoid Damage
Invest in quality tools like a tapping block, pull bar, and rubber mallet. These tools help apply controlled force, reducing the risk of chipping or splitting planks. I learned this lesson the hard way when I used a metal hammer directly on the planks, leaving marks. Using a rubber mallet and tapping block protected my materials and led to a tighter, cleaner fit. Remember, tools are your allies; using them correctly is key to success.
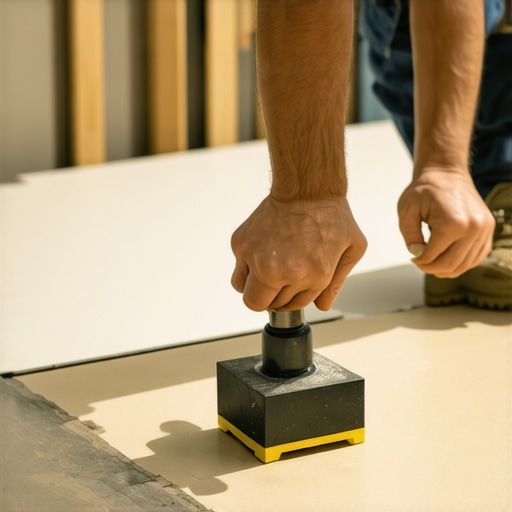
Visualize the process with an image of a worker using a tapping block and mallet to lock vinyl planks accurately, illustrating gentle, controlled tapping to prevent damage.
Testing the Lock for Security
Once you’ve clicked the planks together, gently try to lift the edges to ensure a firm lock. If they lift easily, re-tap the edges with a rubber mallet and tapping block. I once thought the planks were securely locked, only to find them loose after walking on the floor. Testing the connection prevents future problems and guarantees a long-lasting installation.
When it comes to flooring, many assume that following the basic steps guarantees success, but in reality, there’s a lot more beneath the surface. One common misconception is that a perfectly level subfloor isn’t crucial for hardwood or tile installation. Yet, experts warn that even minor dips or humps can lead to significant problems down the line, such as cracking, lippage, or uneven wear. According to a study published in the Journal of Building Engineering, subfloor irregularities account for over 60% of installation failures, emphasizing the importance of meticulous leveling practices.
Another overlooked nuance is the myth that all flooring adhesives or thinsets are universally suitable. In truth, choosing the wrong type can cause bonding issues, moisture retention, or even tile popping, especially in fluctuating climates. For example, some adhesives are not compatible with floor leveling compounds, which can lead to delamination. Always consult with flooring professionals or refer to trusted guides like professional leveling techniques to select the appropriate materials.
Many people underestimate the impact of moisture content in concrete slabs before installing hardwood or tile. Excess moisture can cause hardwood to swell and gap or tiles to debond. A common mistake is skipping moisture testing, which might seem insignificant but can cost you dearly. Implementing proper moisture barriers and conducting tests such as the plastic sheet method can prevent these issues from developing. For advanced insights, check out concrete moisture testing tips.
It’s also worth challenging the belief that flooring installation is just about laying materials down. The preparation phase is where most failings originate. For example, acclimating wood to your home’s climate is vital; skipping this step causes expansion issues later. Similarly, inconsistent cutting techniques or inadequate gap allowances result in aesthetic flaws and structural problems. Mastering these details distinguishes good installations from great ones, as highlighted in expert design and installation.
Let’s not forget the significance of understanding material nuances. Hardwood species differ in hardness, moisture tolerance, and finishing needs. Overlooking these specifics can lead to premature scratches, cupping, or finish degradation. Reclaimed hardwood, for example, requires different handling than new, kiln-dried planks. Educating yourself on these distinctions helps avoid costly mishaps and extends your floor’s lifespan. As per industry reports, choosing the right hardwood type can nearly double its durability and aesthetics over time.
Thinking beyond the basics reveals that flooring installation is a complex craft—one that demands attention to detail, knowledge of materials, and nuanced understanding of environmental factors. Avoiding common pitfalls such as poor subfloor preparation, improper material selection, and ignoring moisture issues can save significant time and money while ensuring a stunning, durable finish. Have you ever fallen into this trap? Let me know in the comments, and remember, thorough preparation is the secret to flooring success.
Keeping It Working: Tools and Maintenance Strategies
Achieving a durable, beautiful floor goes beyond the initial installation. Regular maintenance and the right tools are vital for preserving your investment and ensuring your floors look their best over time. Personally, I rely on specialized equipment like a high-quality laminate floor cleaner and a microfiber mop to maintain hardwood and tile surfaces, preventing dirt buildup that can cause scratches or dullness. Investing in a good vacuum with adjustable settings helps me remove debris without damaging delicate finishes.
For deep cleaning, I recommend a steam cleaner designed explicitly for wood or tile floors. It penetrates into crevices and grout lines, removing stubborn grime without harsh chemicals. When dealing with grout stains or stubborn spots, I use a grout brush with stiff nylon bristles, which I find more effective than generic scrubbers—this allows me to restore grout lines without causing surface damage.
Floor leveling is another critical component that demands precision tools. A laser level or a long straightedge makes it easier to identify uneven spots on the subfloor. I often use a digital moisture meter to check for residual moisture in concrete slabs, preventing common issues like tile lippage or hardwood buckling as discussed in this comprehensive guide. These tools help me diagnose problems early, so I can address them before final installation.
Protective equipment like rubber shoes, knee pads, and dust masks is also non-negotiable. I want to ensure my workspace is safe and clean, especially during sanding or grinding operations. Using a HEPA vacuum system during refinishing minimizes airborne dust, which can affect indoor air quality and cause long-term damage to your respiratory health.
How can I preserve my hardwood or tile floors over time?
One proactive approach is applying a high-quality, breathable sealant tailored to your flooring type. Regularly reapplying a finish or sealant prevents moisture ingress, scratches, and fading. For hardwood, I often use a microfiber applicator to evenly spread an eco-friendly polish, which I then buff with a soft cloth—this routine keeps the surface glossy and resilient. Additionally, setting up door mats and avoiding high-traffic areas can significantly extend your floors’ lifespan.
Looking ahead, the trend in flooring maintenance is moving toward smart solutions. Advanced nano-coatings and AI-integrated cleaning devices are on the horizon, promising even longer-lasting results with minimal effort. For now, sticking to proven techniques and investing in quality tools can make a palpable difference. I encourage you to try out a professional-grade grout brush or moisture meter—they might just save you from costly repairs down the line.
What’s the secret to maintaining your floors effortlessly?
Consistent, gentle care paired with the right equipment is key. Regular inspections, combined with preventive measures like sealing and using appropriate cleaning tools, will keep your flooring pristine and functional. For further insights into proper maintenance routines, check out this detailed guide. Remember, investing in quality tools today can save you time, money, and frustration tomorrow. So, grab that microfiber mop, invest in a good moisture meter, and give your floors the care they deserve—your future self will thank you.
Unforeseen Lessons That Changed My Approach to Flooring
One of the most eye-opening lessons I learned was that patience truly pays off. Rushing through subfloor prep or skipping moisture testing might save time initially, but it often leads to costly repairs down the line. I also discovered that every flooring material has its unique quirks—reclaimed hardwood, for instance, demands different handling than engineered planks. Recognizing these nuances has been pivotal in achieving durable, flawless results.
Additionally, I realized that tools are extensions of your skill—investing in quality, and using them correctly, can make the difference between a professional-looking finish and a botched job. Over time, I’ve come to appreciate that understanding the subtle interactions between materials, tools, and environmental factors transforms installation from a chore into a rewarding craft.
My Top Picks for Helpful Resources and Tools
First, Tile Trend’s installation pointers are invaluable—they distill complex techniques into actionable steps, saving both time and frustration. For moisture testing, the concrete moisture tests guide helped me anticipate issues before they became problems.
Regarding tools, I highly recommend a high-quality moisture meter and a precision laser level. These have become my go-to on every project, providing confidence that my subfloor preparations are spot-on. Additionally, a good tapping block and soft mallet are essential for delicate, damage-free lockings—trusted companions in my install arsenal.
For learning more, books like ‘Transform Your Living Area With Elegant Tile Designs’ have deepened my appreciation for design harmony and technical finesse—definitely worth a read to inspire your next project.
Embrace the Challenge and Transform Your Space
Every flooring project presents an opportunity—not just to improve your home’s appearance, but to hone your skills and confidence. Remember, thorough preparation, the right tools, and patience are your best allies. The journey might be challenging, but the satisfaction of walking on a perfect floor is unparalleled. I encourage you to dive in with enthusiasm and a mindful approach; your future self will thank you for the effort.
What’s the biggest flooring challenge you’ve faced, or fear facing? Share your experiences below—let’s grow and learn together!