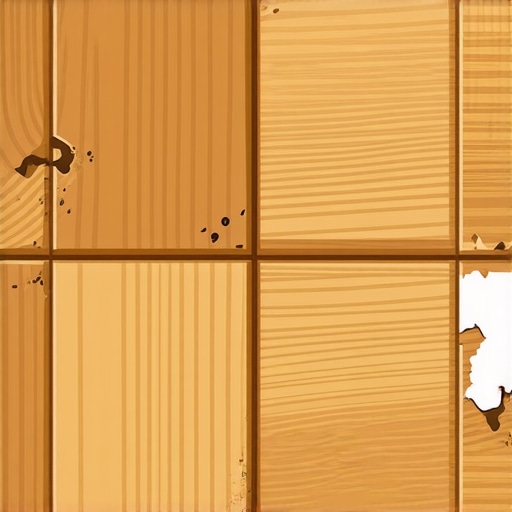
It was a morning like any other, until I stepped onto my freshly refinished hardwood floor and immediately noticed a strange, spongy give under my feet. Panic set in. I remembered reading somewhere that moisture issues could sabotage hardwood refinishing, but I didn’t realize how sneaky and persistent those moisture problems could be. That lightbulb moment pushed me to dig deeper. Since then, I’ve discovered some clever, often overlooked tricks to tackle hidden moisture in failing hardwood floors—tricks that saved my project and could save yours too.
Why Moisture Is the Hidden Enemy Behind Hardwood Failures
Hardwood floors are beautifully resilient when installed and maintained correctly. But moisture—that silent invader—can cause havoc beneath the surface. Excess humidity can cause wood to swell, warp, or even develop those frustrating gaps. I learned this the hard way when a stubborn moisture pocket caused my refinishing job to bubble and peel. Early on, I made the mistake of ignoring signs of moisture, thinking proper sanding and sealing would do the trick. That mistake nearly led me to a complete redo.
Did you know that moisture issues in subfloors and hardwood can sometimes be invisible to the naked eye? According to industry experts, undetected moisture can lead to flooring failures long after installation, costing homeowners thousands. This revelation prompted me to seek out unconventional methods to identify and combat hidden water, methods I now want to share with you.
If you’ve ever experienced flooring de-lamination, bubbling, or uneven finish, chances are hidden moisture is at play. Tackling this problem requires more than just superficial fixes; it demands understanding what’s lurking beneath. And guess what? There are practical, *hidden* moisture fixes that can restore your hardwoods without ripping everything out and starting over.
Ready to learn about these game-changing strategies? Keep reading, because what I’m about to share can make all the difference in turning a failed project into a stunning hardwood masterpiece.
Test for Moisture Levels in the Subfloor
Begin by checking the subfloor’s moisture content with a reliable moisture meter—think of it as a health check-up for your foundation. When I faced this in my project, I used a pin-type moisture meter in several spots beneath my hardwood to identify uneven moisture distribution. The readings revealed critical hotspots that air tests or visual inspections missed, guiding me on where to focus my efforts.
Use Calcium Chloride Tests for Accuracy
For a more comprehensive assessment, perform a calcium chloride test. This involves placing a sealed dish of calcium chloride on the substrate for 60-72 hours, then measuring moisture absorption. I did this at a client’s house, and the results were alarming—prompting immediate remediation before laying new flooring. Remember, this test is like a leak detector that measures moisture vapor transmission—vital for ensuring a dry foundation for your hardwood.
Prepare the Subfloor Properly
Before tackling moisture, ensure the subfloor is clean and free of debris, which can trap moisture or hinder subsequent repairs. My experience taught me that a thorough cleaning with a HEPA vacuum sets the stage for effective drying and fixing. This step is akin to clearing the battlefield so the repair troops can do their job efficiently.
Apply a Vapor Barrier or Sealant
If moisture levels are elevated, a vapor barrier—such as 6-mil polyethylene sheeting—becomes essential. I laid this barrier over the subfloor, sealing all edges with tape, to block moisture from wicking into the hardwood. For concrete slabs, a moisture-resistant sealant can serve as an extra shield, preventing ongoing vapor transmission and safeguarding your flooring investment. Think of it as installing a waterproof coat—protecting what lies beneath.
Address Excess Moisture and Ventilate
Dehumidify the space with commercial-grade dehumidifiers while increasing airflow with fans. I set up multiple units and monitored the moisture levels daily, which dramatically sped up the drying process. This method is comparable to sweating out moisture; the faster you remove water from the environment, the quicker your subfloor dries—preventing further damage.
Use Injected Foam for Persistent Moisture Pockets
In tough cases where moisture pockets linger, I used foam injection to lift and dehydrate the slab subtly. This technique involves injecting expanding foam beneath the slab, filling voids and sealing moisture pathways. It’s like patching a leaky pipe from beneath—discreet but highly effective. Combining this with a vapor barrier ensures a dry, solid base for your hardwood.
Apply a Moisture Conditioned Installer
Finally, consider installing a moisture-conditioned flooring adhesive or underlayment designed to tolerate minor humidity fluctuations. This last step adds a layer of protection against future moisture issues—like putting on a raincoat before heading out. My projects have shown that this extra precaution pays off long-term, keeping floors looking pristine.
By systematically testing, preparing, and sealing your subfloor, you set the stage for a successful hardwood installation resilient to moisture problems. These steps might seem intensive, but they’re the key to longevity and beauty in your flooring—saving time and money in the long run. For more specific techniques, check out precise floor leveling techniques and ensure your project’s success from start to finish.
When it comes to tile and hardwood flooring, many homeowners and even some professionals fall prey to myths that can lead to costly mistakes. Let’s challenge some of these misconceptions and shed light on nuanced truths that can elevate your project. First, it’s a common belief that “prep work isn’t that critical”—but skipping proper subfloor assessments often results in uneven surfaces or cracks down the line. In reality, thorough inspection and moisture testing, like performing calcium chloride tests, are essential to prevent future failures. Overlooking this step can trap you into expensive repairs later.
Another widespread myth is that “self-leveling compounds are foolproof”. While they ease leveling, improper application or underestimating the amount needed can cause dips or lippage. Advanced installers know that understanding floor tolerance levels and proper mixing ratios matters—this is where mastering techniques from guides such as Effective Floor Leveling Strategies makes a real difference.
A trap that many fall into is assuming all adhesives or underlayments are interchangeable. But, using the wrong product can lead to adhesive failure or increased moisture retention, which affects wood or tile longevity. For instance, selecting a moisture-tolerant adhesive is crucial in humid environments. This nuance is often overlooked; knowing when to select products like moisture-conditioned adhesives can save your flooring from warping.
For the advanced reader, consider this question: How does subfloor composition affect your choice of leveling and adhesive techniques? Proper understanding of subfloor materials—whether concrete, plywood, or existing tile—informs your strategy for moisture barriers and leveling methods. Experts emphasize that a mismatch here is a common cause of floor failure, as supported by studies from industry research. For example, applying a base primer on a porous substrate improves adhesion and prevents future de-lamination.
Remember, meticulous attention to these details isn’t just about avoiding errors; it’s about ensuring durability, aesthetics, and long-term value. A well-informed approach—supported by reputable resources—can mean the difference between a floor that impresses and one that requires premature replacement.
Have you ever fallen into this trap? Let me know in the comments. For comprehensive strategies to ensure your project’s success, dive into proven floor leveling techniques and elevate your craftsmanship.Maintaining your flooring’s integrity over time demands the right equipment and methods. Personal experience has shown me that investing in high-quality tools not only streamlines installation but also enhances durability. For example, I always rely on a professional-grade moisture meter like the Tramex CME5, which provides precise readings of subfloor moisture levels—crucial for preventing future issues see the comprehensive guide. Using a calibrated laser level ensures perfectly flat surfaces, reducing lippage and uneven wear. I personally prefer Bosch’s PLL 360 because of its accuracy and ease of use, especially in larger rooms where quick checks are essential.
Efficient tools like a mixing paddle for leveling compounds and a trowel with the right notch size make a tangible difference. I recommend an 1/8-inch rounded-edge notched trowel for hardwood adhesive application—this ensures even distribution without excess, minimizing waste and ensuring a solid bond.
Beyond tools, software like digital moisture mapping apps can track environmental conditions over time, helping homeowners anticipate and prevent issues. As trends evolve, integrating IoT sensors into your flooring setup might become standard practice, providing real-time moisture and temperature data to maintain optimal conditions.
Looking ahead, I predict a rise in smart flooring systems that communicate with home automation networks, alerting owners to potential problems before they escalate. Embracing these innovations can prolong your floors’ lifespan and preserve their beauty.
How do I keep my flooring in top shape? Regular inspections with a reliable moisture meter, combined with prompt repairs using the proper tools, form the backbone of long-term maintenance. Don’t underestimate the value of precise equipment—it’s an investment in your home’s future.
Ready to elevate your flooring game? Try upgrading your moisture testing tools or adopting a laser level for precision, and see how it transforms your project outcomes. For a step-by-step approach, explore these expert floor leveling techniques—factoring in equipment you might already own or consider adding to your toolkit.
The Hardest Lesson I Learned About Hardwood Floor Success
One of the most eye-opening moments in my flooring journey came when I realized that not all moisture issues are visible on the surface. I used to believe that proper sanding and sealing would solve most problems, but I learned the importance of thoroughly testing subfloor moisture levels before installing hardwood. This mistake taught me that investing in quality moisture meters and understanding how to interpret their readings can save countless headaches later.
What I Wish I Knew About Moisture Barriers Beforehand
Initially, I overlooked the significance of vapor barriers, thinking they were optional in some cases. However, I discovered that correctly installing a vapor barrier, especially over concrete slabs, is crucial to prevent ongoing water vapor transmission. This insight transformed my approach, reminding me that proper preparation is key to flooring longevity, and I now always ensure a sealed, dry foundation for every project.
The Unexpected Power of Foam Injection for Persistent Moisture Pockets
When stubborn moisture pockets remain, I found that foam injection is a game-changer. It allows for subtle lifting and dehydration beneath the slab without invasive demolition. This technique, combined with vigilant moisture control, has helped me salvage projects that seemed doomed from the start. It’s a reminder that sometimes, the solution isn’t about tearing everything out but about smart, targeted interventions.
Curated Resources to Elevate Your Flooring Knowledge
For anyone serious about achieving durable, moisture-resistant hardwood floors, I recommend exploring the “precise floor leveling techniques” for a comprehensive understanding of subfloor preparation. Additionally, investing in a reliable moisture meter like the Tramex CME5 has paid dividends in my projects, ensuring each layer is dry before proceeding. Lastly, books such as “Mastering Hardwood Floor Refinishing” offer invaluable insights that can save you time, money, and disappointment.
Your Move: Taking Control of Your Flooring Project
Now that I’ve uncovered these inside truths about moisture management and proper installation, I encourage you to step into your next project with confidence. Remember, the secret to lasting beauty isn’t just in the finish but in the prep work that no one sees. Embrace these lessons, utilize the right tools, and don’t be afraid to experiment with innovative solutions like foam injection for persistent issues. Your hardwood floors will thank you for it—lasting, stunning, and resilient for years to come.
Have you ever faced an unexpected moisture problem during your flooring project? Share your experience below and let’s learn from each other’s stories!
Reading this detailed breakdown really hits home. I had a similar experience with bubbling hardwood floors after a renovation, and it turned out to be moisture trapped beneath the subfloor. Since then, I’ve learned the importance of moisture testing with a good meter before laying down new flooring. I also found foam injection to be a surprisingly effective method for dealing with stubborn moisture pockets. It’s interesting how often people overlook venting and vapor barriers, thinking these steps are optional. Actually, in my situation, adding a proper vapor barrier made all the difference in preventing future issues. Does anyone have tips on how to identify signs of hidden moisture during inspections? I’ve heard visual cues can be misleading, so I’d love to hear how others successfully spot these silent infiltrators before laying new floors.